The combination of the power point and the device that controls the lighting devices allows you to rationally organize the power supply of residential or office space. Agree, it is much more convenient if the electrical fittings are grouped, and not randomly "scattered" around the room.
In addition to weighty ergonomic advantages, such a technical solution has a lot of design advantages. However, it also makes you think about how a socket with a switch in one case is connected to the mains. In our article you will find answers to all the complex and simple questions that arise during the installation of such a unit.
We present comprehensive information on installation methods and connection methods for block-type electrical devices. The subtleties and nuances are highlighted in photo selections and videos that clearly demonstrate the specifics of the work. Such powerful information support will help you to cope with the task perfectly.
Connecting sockets with a 1-3-key switch
Since then, when the wires from the switch were connected to the electric circuit, do not understand how, and in some cases even at random, quite a bit of time has passed. It is noticed that in old houses and buildings a sufficient number of devices were connected in violation of many safety requirements.
Yes, this approach did not in any way affect the performance of the components. Everything is functioning normally, only the safety of such devices is in question.

Switching an outlet through a switch is a popular way to safely control household appliances or tools that do not have their own power button
Every year, saving money and space remain priority factors. That is why, to reduce the number of wires and the used space on the wall, manufacturers of electrical appliances combined several devices in a single design.
The combination of a single and two-gang switch with a socket increases the ultimate efficiency and comfortable use of such electrical equipment.

The combination of electrical appliances with each other, using a one-piece housing, allows you to save space and reduce the number of wires involved
It should be remembered that to connect a block wiring device, you need to choose a cable taking into account the maximum load.
# 1: Ways to connect the switch-socket unit
There are several ways to attach a merged block. This feature has become available relatively recently. Previously, it was impossible to find electrical equipment of different options in a single building in the house.

A socket with a switch connected in one housing is more attractive in appearance, has no gaps or joints
The method of connecting the switch and the socket was carried out by connecting the wiring in the box, but without mixing the devices themselves. This method is used today, if for certain reasons it is impossible to install consumers next to each other.
At the same time, the option of unpaired connection of the design also has its advantages. Consider them below:
- Similar devices are publicly available. Buying even a cheap switch with a socket will make it possible to connect them in one circuit.
- Work on connecting these electrical appliances can be done easily even with your own hands.
- Increased safety level when using separately connected mechanisms, since the wiring to them is laid separately, which reduces the likelihood of a short circuit.
So why in recent years in the houses they prefer special blocks, where the combination of the outlet and the switch is laid down by the supplier. And all because a similar plan for connecting the device is more facilitated.
Firstly, there is no need to lay two separate cables to the devices. Secondly, the advantages of such a unit are much greater than those of the divided ones.
We list some of them:
- Simplified transfer of such a block to another place. Now there is no need to lay two separate wiring.
- Twice to measure the height during the installation of the above devices is no longer necessary, since this is one block.
- High quality appliances can be used outdoors and indoors.
- The combined unit is easier to mount on surfaces made of concrete, stone, wood and drywall.
The main disadvantage of the connected unit is that it cannot be replaced if one part is broken. It doesn’t matter if it is a network socket or directly a switch. Almost always, a complete replacement will be required.
New units are manufactured with a one-, two- or three-button switch, which is combined with a socket in the whole product.
Consider the step-by-step process of replacing a block-socket system:
Image Gallery
Photo from
Step 1: The main reason for installing the socket / circuit breaker is the failure of a similar operating device
Work is carried out according to a scheme similar to standard processes for installing electrical wiring products. First, dismantle the external parts
After removing the key, remove the frame that fixed the switch mechanism in the slot
Unscrew the bolts of the metal frame holding the mechanism of the outlet
In order to make sure that the work with the wires will be really safe, once again we check the presence of voltage in this section of the network
In order not to accidentally damage the old wiring, which is not planned to be changed, carefully unscrew the fixing screws
We release the wires connected to the lighting line from the damaged mechanism
We trim the edges of the wires that were used in the previous connection, and again remove about 1 cm of insulation from each core
Step 1: Removing the Damaged Block
Step 2: Removing the Switch Key
Step 3: Removing the Lock Frame
Step 4: Removing the Outlet Frame
Step 5: Recheck for No Voltage
Step 6: Separate the wires from the receptacle
Step 7: Removing the Circuit Breaker
Step 8: Cutting and stripping wires from insulation
After completing the dismantling of the old device and preparing the wiring, we proceed to install and connect the new unit from the outlet with a switch.
Image Gallery
Photo from
Step 9: Installing the Circuit Breaker
Step 10: Connecting the Outlet Mechanism
Step 11: Install the Holding Frames
Step 12: Attaching the Front of the Unit
# 2: Connecting and switching the socket through the switch
There is a specific sequence that defines how to connect a socket with a switch in a one-piece design. It should be remembered that it is based on standard wiring diagrams for wiring devices and mandatory compliance with PES.
An elementary way to connect wires from the network is to connect them to devices according to a clear plan in the distribution box.
The following work algorithm will tell you how to correctly connect a socket with a switch connected to the unit:
- For the indoor unit, a special hole in the wall is prepared, and for the outdoor unit, a suitable space for installation is selected. For rooms in wooden buildings, the most commonly used are overhead paired mechanisms with combined electrical units. This method is used, for example, with open wiring.
- The junction box has six (6) cores of incoming electrical cables. One pair for the outlet, the second from the switch, and the third for the switchboard. Each pair is a phase and zero veins. Most often in homes you can see an additional ground wire.
- First of all, we determine the phase that comes from the distribution panel, and de-energize the room.
- The next step is to connect the phase cable from the mains to the wire going to the switch. It is necessary to strip the ends of the phase conductors, then twist them together and isolate. For this, electrical tape is used.
- Next, the zero core of the network must be connected to the wire from the outlet. We also wrap them with insulating material.
- The idle edges of the wires from the combined unit are also twisted together and are necessarily rewound with electrical tape.
- This connection scheme will ensure the connection of the phase cable of the outlet through the switch. The effectiveness of this method is noticed when the network jack is very rarely used, and the connected devices must be constantly on / off.
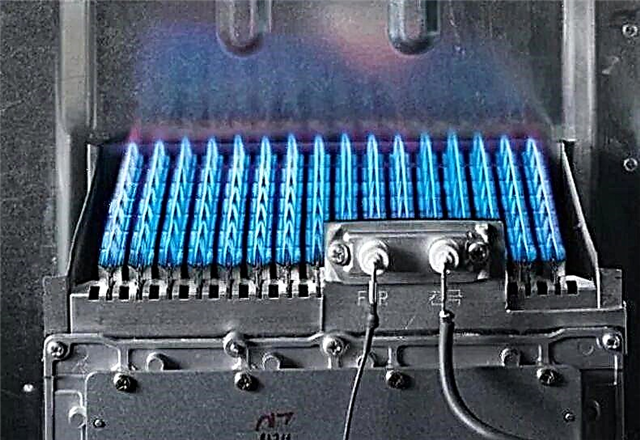
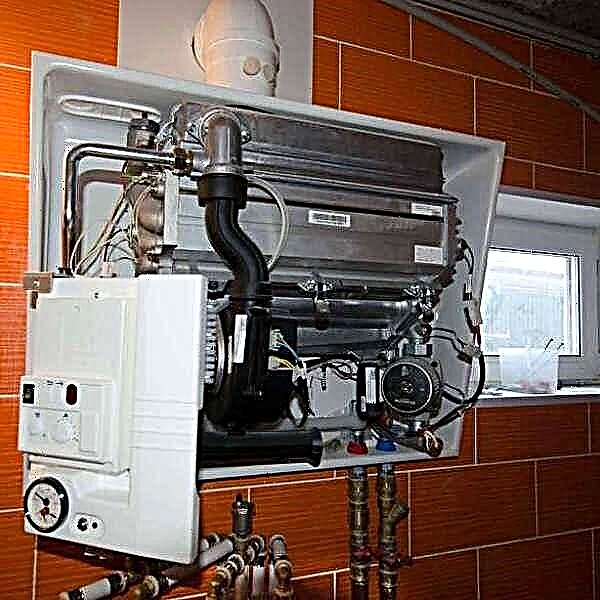
The mechanism combined in a single body is relatively simple. A phase is supplied to the outlet through the switch if the switch is activated. Such a scheme is popular, for example, if you need to heat water in a heater that does not have its own off / on button, but you do not want to pull the plug constantly.

A significant advantage of mounting a socket-switch unit is the reduction of marking work, the formation of "seats", alignment of the position of the unit
Another way is to connect the lighting in the utility room through an extension cord. Then you can turn it off just using the one-button switch.
# 3: Installation of connected sockets with a switch
Blocks of wiring devices combined in a single housing are in great demand. The main factor remains that both devices will be used separately.
To install such a socket and a switch from the lamp, a number of simple steps are carried out:
- From the main shield, cables with zero and phase are laid to the junction box.
- The box must contain five (5) wires - two (2) from the lamp and three (3) from the unit that combines the individual devices.
- The phase core from the shield must be connected to the wire from the outlet. Using a jumper, connect the socket to the terminal on the switch.
- A zero core from the electrical network must be connected to a wire with zero from the lamp and the outlet.
- Phase cables going from the cartridge to the switch must be twisted and insulated.
- Grounding is also connected using the appropriate cable.
A similar circuit with an integrated socket and switch will work separately from the circuit breaker. And the main functions of a single-button circuit breaker (on / off electric lamps) will also be performed independently.

By observing the correct wiring diagram for each wire, you can protect yourself from subsequent corrections, as well as from unforeseen situations
If you want to know how to connect a double switch that controls two bulbs, you should pay attention to the information in the next article, which we recommend that you read.
# 4: Connecting a socket with a two-gang switch
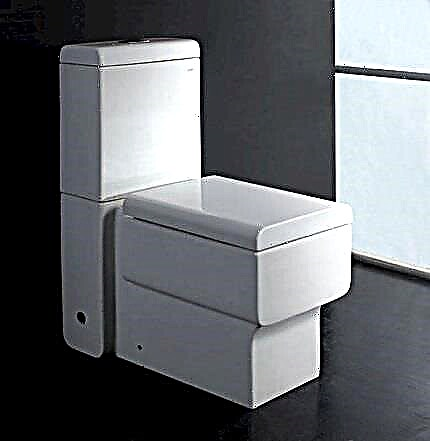
Most often, a unit connecting a socket and a two-button switch is installed between the entrance to the toilet and the bathroom. Alternatively, it can be installed in a large room to supply voltage to one to three light sources.
Conclusion: thanks to a single unit, the user can control the light in several rooms at once, as well as connect any device that consumes electricity to the outlet.
Consider the wiring diagram of the integrated device, consisting of 7 steps:
- The first step is to lay five (5) conductors from the distribution box to the dual electrical system.
- From the distribution panel, conductors with zero and ground are only connected to the outlet.
- Thanks to a special jumper in the linking unit, the phase is applied to the dual disconnect device.
- Both free conductors are connected to two connecting nodes of the circuit breaker, through which the phase is supplied to the lighting devices in the bathroom and the restroom.
- It is necessary to twist the cables with the phase (from the switch) with free cores (from lampholders with lamps) in the toilet and bathroom.
- In the sorting box, the cable with "0", as well as the ground wire from the outlet, must be twisted with the bare ends of the twists from the lighting.
- There are times when the order of the keys on the switch needs to be changed. To do this, the cores on the switching contacts, supplying voltage to the lamps in the bathroom and the toilet, simply change places.
It turns out that the wiring diagram for a single and two-key switch combined with a socket differs only in the amount of time spent and the number of wires. Four (4) cables are used for a one-button device, and five (5) conductors for a two-gang switch. Both options include grounding.

Do not worry, because the connection scheme of the combined unit with a socket and a two-button switch has very few differences
# 5: Mounting the unit with a socket and a three-gang switch
A three-gang switch with a socket is used to save energy. In recent years, is in great demand among electricians, specialists and ordinary people.
Previously, three-key switches with a socket were installed only in panel houses. Their main purpose was to control the light in the kitchen, bathroom and restroom. But the network socket was provided for domestic purposes - connecting a hairdryer, electric shaver, vacuum cleaner and other devices. Since then, a lot of time has passed, most of them need replacing.
Modern layouts and design capabilities allow the use of a three-key shutdown device as the main control link of several light sources for one room. Among them:
- main;
- additional light sources;
- decorative.
This method saves a person from the need to connect fixtures with a lack of lighting. On the other hand, it protects a person from the excessive amount of light in the room and will allow him to muffle. The light control remains under your complete control, thanks to one single switch.
In addition to convenience, such a three-key block decorates the room. Agree that a single unit with a socket looks more aesthetically pleasing than three separate ones. In addition, the amount of time and effort spent installing it is much less.
A three-key device is usually mounted in rooms of this type:
- in the place where multi-tiered lighting is planned;
- in rooms with a large area and complex shape;
- in narrow and long transitional rooms;
This switch is also mounted to control lighting in several rooms, such as a toilet, bathroom and hallway, from a single place. It can also be used in workrooms to highlight a particular desktop.

As in the case with the two-button switch, the three-key unit with a socket has a simple circuit, having only one difference
The configuration of the device with a socket is not much different from a conventional three-button switch. The zero wire going straight to the outlet is the main difference.
Previously, such a design could cause inconvenience. The passage of time has changed this rule. Since the fashion for the location of the switches has changed significantly, installing the outlet above the baseboard, and the switch at a distance of 800–900 mm from the floor, becomes an almost unclaimed option.

A similar arrangement of sockets and switches is gradually fading into the background, because convenience and adherence to design are a higher priority goal of modern layouts
There are several rules when choosing a switch. Then it will last longer and not cause discomfort.Here are the main ones:
- keys do not sink;
- do not emit extraneous sounds when pressed;
- the internal part of the switch contains a circuit for its connection;
- smooth and even surface.
Also, attention should be paid to the degree of protection of the device - this is the IP code on the package. The first figure reflects the level of protection against dust, the second - from moisture. Value and effectiveness are indicated from zero (0 - lack of protection) to six (6 - the highest level of protection).
For example, when installing the switch in the bathroom or in the shower room, it is necessary to purchase a device with IP 44. If it is a street - protection level 65. When installing the switch in the lounge, IP 20 will be sufficient.
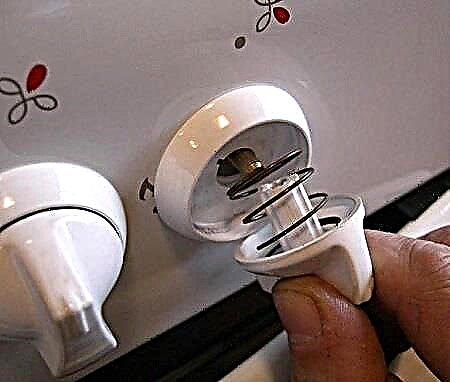
When commissioning a switch with a socket, it is difficult to do without certain tools, such as:
- pliers for clamping and gripping parts;
- stripper to remove insulation from the edge of the wire;
- flat and Phillips screwdrivers.
The installation scheme of the three-key switch is also not much different from connecting a two- or one-button device.

The comfortable installation / repair work of the combined units, sockets and switches largely depends not only on the skills of the specialist, but also on the tools used by him
Consider them again:
- Before starting work, you need to make sure that the network is completely disconnected.
- Zero and phase cables must be distributed.
- Check the phase with a special screwdriver with indicator.
- Connect the cable to the junction box.
- Test the connection.
An important skill during installation is the skill of finding wires with zero and phase. Usually, a certain wire has its own color. The zero core is blue, and the phase is black or red.

The most successful tool for helping novice electricians is an indicator screwdriver, which has special susceptible elements and a reflective sensor
There are several ways to determine the phase. Its presence will tell the indicator on a screwdriver or a simple incandescent bulb. The first option is preferable because it is simpler. For the second method, the lamp needs to be screwed into the cartridge, and alternately shortened the output wires. When the cable is in the zero phase, the bulb shines brighter.

One of the available methods for determining the phase is a bulb and a cartridge, use this option only if there is no indicator screwdriver
To purchase one-, two-, three-key circuit breakers with a socket - the process is not complicated. But, as practice shows, not everyone can figure out a connection plan. Therefore, this article appeared. Now to independently carry out the installation, and even more so the replacement of the switch with a socket has become much easier.
Finally, a few recommendations. In the process of dismantling the old block, it is better to sign each disconnected wire. This will significantly save time on connection and immediately figure out where to connect which wire.
Carrying out these manipulations can also be viewed in video format. In them, experienced specialists will explain and show the correct connection of all the above blocks.
Clip # 1. How to connect the socket and switch:
Clip # 2. Reliable electrician in a house or apartment: we connect correctly:
Clip # 3. Block repair with two-gang switch and socket:
Remember, if this article and video did not give you a clear idea about connecting switches, or you never encountered electrical equipment at all, especially if you have to carry out electrical work in the bathroom, contact professional electricians to avoid cases of electric shock or short circuit.
There is a desire to share your own experience as an electrician, found flaws in the article, have questions? Please write a comment located under the text block.